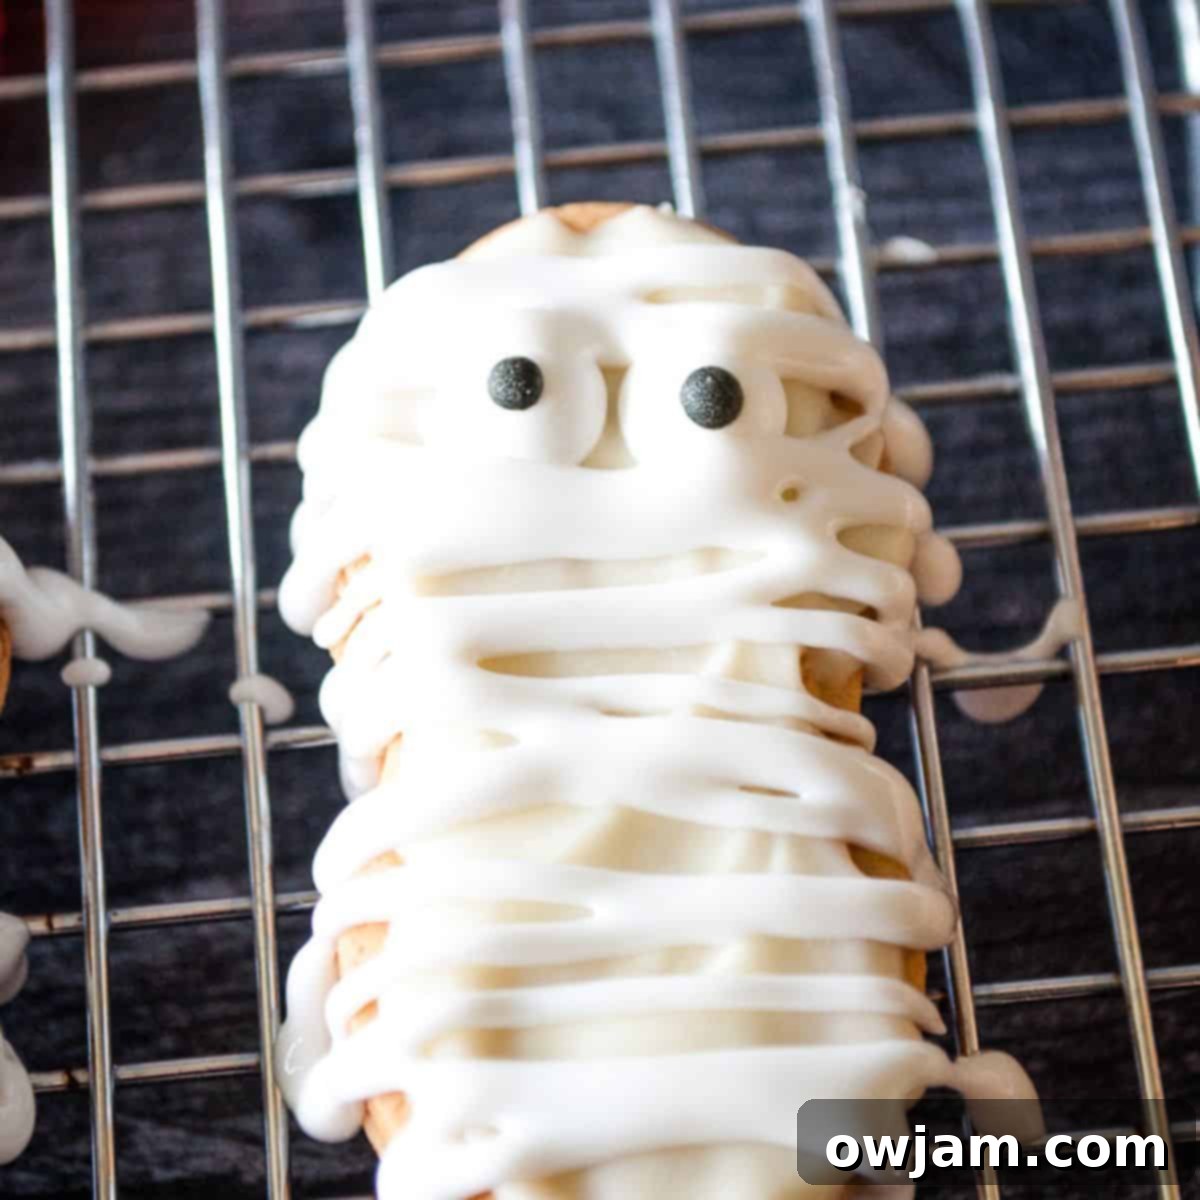
Easy No-Bake Mummy Cookies: The Ultimate Halloween Treat for Kids!
Mummy Cookies are undeniably one of the cutest and most delightful Halloween treats you can make, especially when you’re looking for something quick, fun, and kid-friendly! These adorable no-bake cookies transform simple Nutter Butter cookies into spooky-sweet mummies using just a few common ingredients: white chocolate, white cookie frosting, and whimsical candy eyes. Perfect for a Halloween party, a school treat, or just a fun afternoon activity with the kids, these mummy cookies are sure to bring smiles and get everyone into the festive spirit.
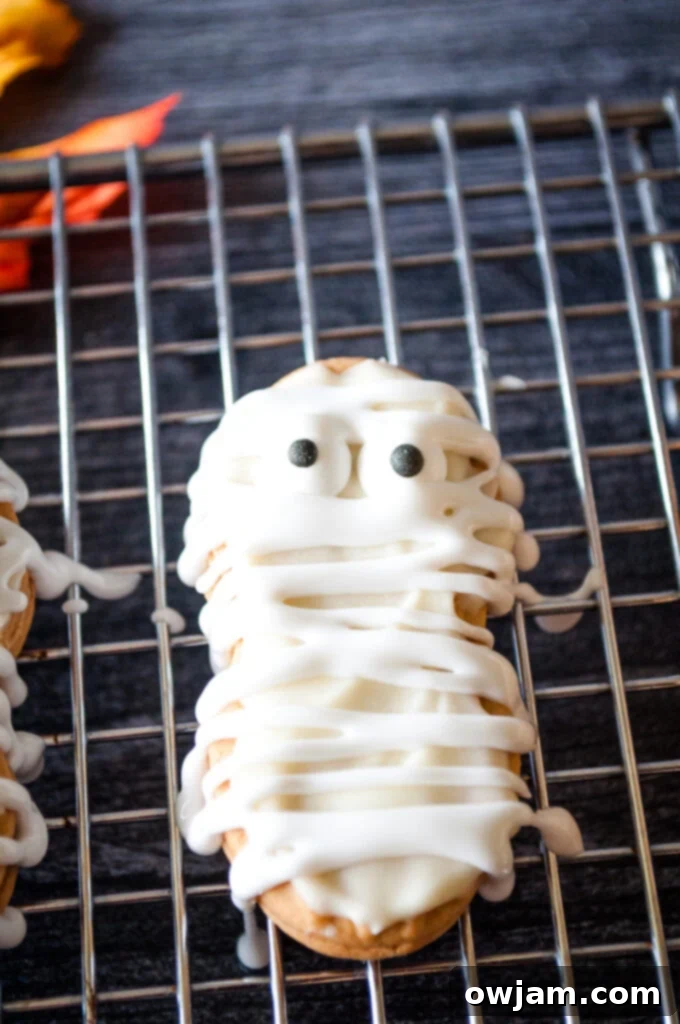
As Halloween approaches, plans might vary from year to year, with some communities allowing traditional trick-or-treating and others opting for safer, at-home celebrations. Regardless of how you celebrate, that doesn’t mean we can’t still enjoy the magic of Halloween with our kids! This adorable Mummy Cookie recipe is here to save the day, offering a fantastic way to create festive memories right in your kitchen.
These Halloween cookies are incredibly simple to make, making them the perfect project for little hands. Your kids will absolutely love participating in this easy Halloween cookie decorating activity, from dipping the cookies to placing the candy eyes and drizzling the mummy “bandages.” The entire process is quick, taking only about 15 to 20 minutes from start to finish, depending on how many spooky treats you’re preparing.
My own children adore these cookies, and I’m confident yours will too. They instantly infuse a wonderful fall and Halloween atmosphere into your home. After all, who doesn’t love a fun, delicious, and easy-to-make Halloween cookie?
You only need a few basic ingredients to bring these charming mummies to life: Nutter Butter cookies for their classic shape and peanut butter flavor, white chocolate chips for dipping, white cookie frosting for the mummy wraps, and of course, those irresistible candy eyes to give them personality. It’s truly that simple! These delightful cookies also make for an excellent addition to Halloween treat bags, ensuring smiles all around.
Why You’ll Love Making Mummy Cookies
These Mummy Cookies aren’t just cute; they’re also incredibly popular for several fantastic reasons:
- No-Bake & Easy: No oven required! This makes them perfect for quick preparation and safe for kids to help with.
- Kid-Friendly Activity: The simple steps are ideal for children of all ages to get involved in the kitchen, fostering creativity and fun.
- Quick to Make: With just about 15-20 minutes of active prep time, you can have a batch ready in no time.
- Minimal Ingredients: You only need four main ingredients, all of which are readily available at any grocery store.
- Adorable & Festive: Their distinct mummy appearance makes them a standout treat for any Halloween gathering.
- Perfect for Parties: Easy to transport and universally loved, they’re a crowd-pleaser for school events, parties, or family celebrations.
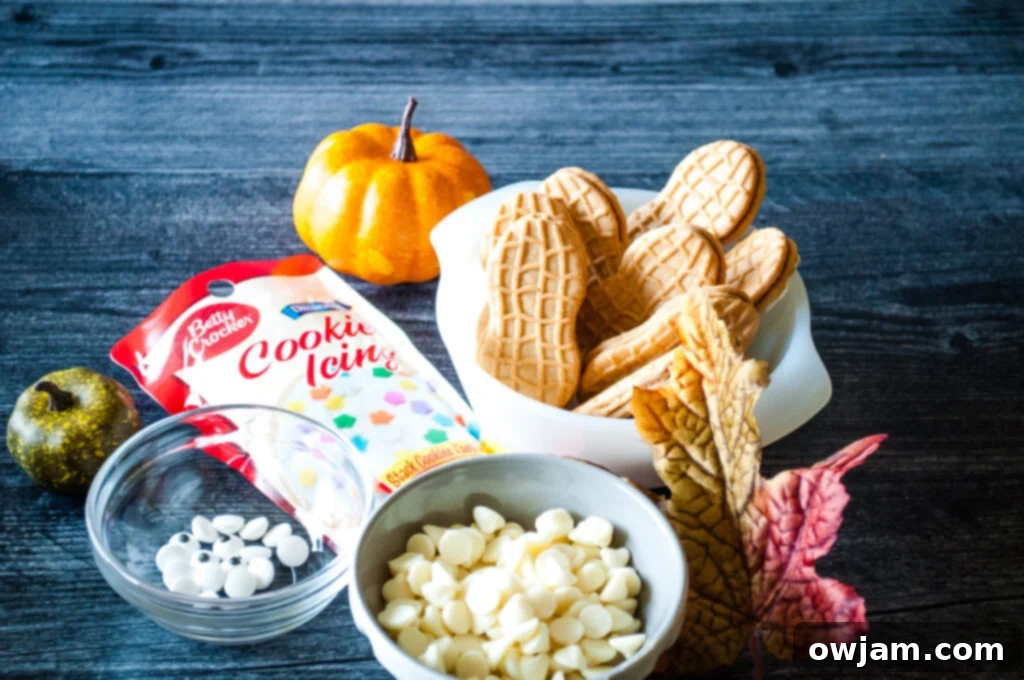
Essential Ingredients for Mummy Cookies
Gathering your ingredients is the first step to creating these spooky delights. Here’s a closer look at what you’ll need and some helpful tips:
- White Chocolate: You will need white chocolate chips, white chocolate melting wafers, or even white candy melts to create the smooth, meltable coating for your cookies. Candy melts are often recommended as they melt very smoothly and set quickly, providing a clean, white base. If using white chocolate chips, choose good quality ones for better melting and flavor.
- Cookies: Nutter Butter cookies are the star here! Their oval shape is perfect for forming the mummy body, and the delicious peanut butter filling adds a wonderful flavor contrast to the sweet white chocolate. For alternatives, you could try using Oreos (for “Oreo mummies”) or even shortbread cookies.
- Candy Eyes: These are crucial for giving your mummies their distinct, playful look! You can find candy eyes in various sizes in the baking aisle of most grocery stores, craft stores, or online. If you can’t find them, you can always use two small dots of black gel frosting, mini chocolate chips (placed upside down), or even tiny pieces of dark chocolate for the pupils.
- White Cookie Frosting: This is what creates the iconic mummy “bandages.” Store-bought white cookie frosting in a tube with a ready-to-snip tip is the easiest option for quick decorating. You can also use a simple royal icing or a stiff white buttercream if you prefer to make your own. The key is a frosting that holds its shape well when drizzled.
Equipment You’ll Need
Making these mummy cookies requires minimal specialized equipment, making it an accessible project for any home baker:
- Microwave-Safe Bowl or Double Boiler: For melting your white chocolate.
- Spoon or Small Spatula: For stirring the chocolate and helping to coat the cookies.
- Parchment Paper or Wax Paper: Essential for lining your baking sheet to prevent sticking and for easy cleanup.
- Baking Sheet: To hold the cookies as they set.
- Cooling Rack: To allow the chocolate and frosting to set evenly with air circulation.
- Piping Bag or Ziploc Bag: If your frosting doesn’t come in a tube, a piping bag with a small round tip or a regular Ziploc bag with a tiny corner snipped off will work perfectly for drizzling.
How to Make Mummy Cookies: Step-by-Step Guide
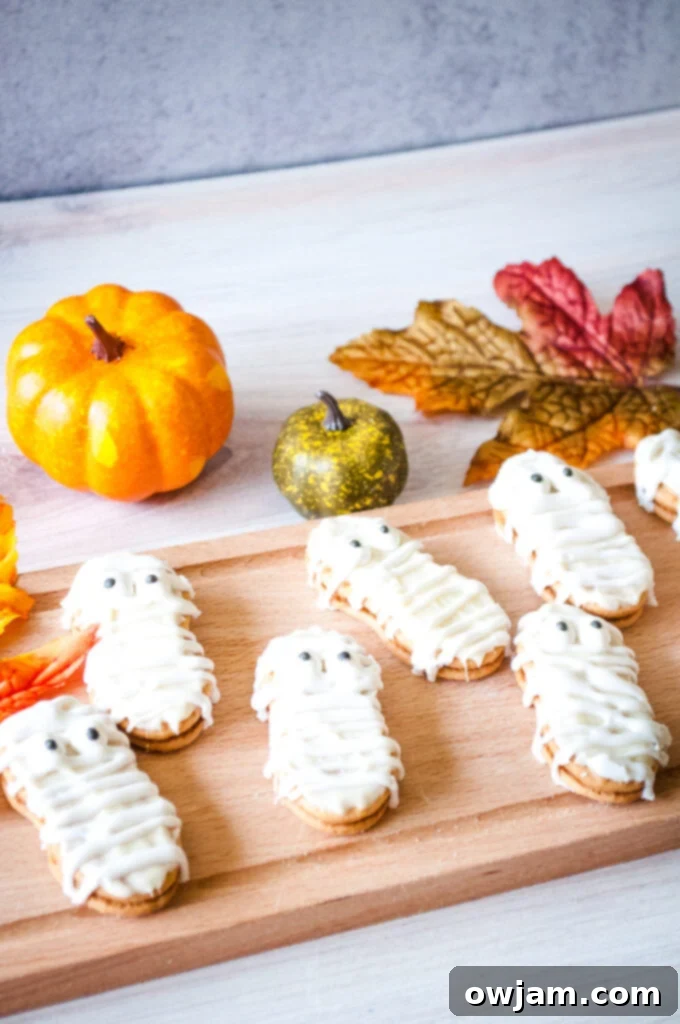
Making these Mummy Cookies is wonderfully straightforward, involving just a few key steps. Before you begin, line a baking sheet with parchment paper or wax paper. This will make transferring and cleaning up much easier.
Step 1: Melt the White Chocolate. Begin by carefully melting your white chocolate chips. You can use a double boiler on the stovetop for a gentle, even melt, or the microwave for speed and convenience. If using a microwave, place the white chocolate chips in a microwave-safe bowl and heat them in short intervals, typically 15-20 seconds at a time. After each interval, stir the chocolate thoroughly, even if it doesn’t look fully melted. Repeat this process until the chocolate is smooth and completely melted, being careful not to overheat it, which can cause it to seize or burn.
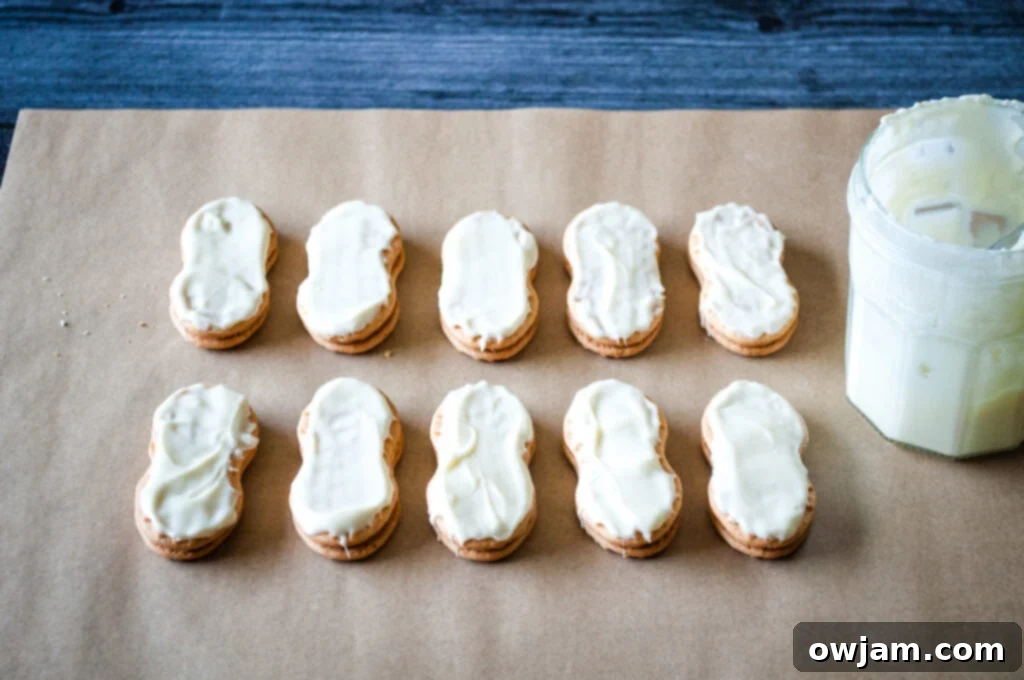
Step 2: Dip Cookies and Add Eyes. Once your chocolate is melted and smooth, it’s time to coat your Nutter Butter cookies. You can dip the tops of each cookie directly into the melted chocolate, ensuring it’s fully covered. Alternatively, if you prefer less mess or a more precise coating, use a small knife or a spoon to spread the chocolate evenly over the tops of the cookies. Gently tap off any excess chocolate to achieve a neat finish. While the chocolate is still wet and warm (this is important!), carefully place two candy eyes onto the upper third of each cookie. The melted chocolate will act as the “glue” to hold the eyes in place. Place the dipped cookies onto your prepared baking sheet.
Step 3: Let Cool and Prepare Frosting. Set the dipped cookies aside to cool and allow the white chocolate to fully set. This might take about 10-15 minutes at room temperature, or you can speed up the process by placing them in the refrigerator for 5-10 minutes. While the chocolate is setting, prepare your white cookie frosting. If it’s in a tube, simply snip off the tip as directed. If you’re using a piping bag or a Ziploc bag, transfer the frosting into it and snip a very small corner for fine lines.
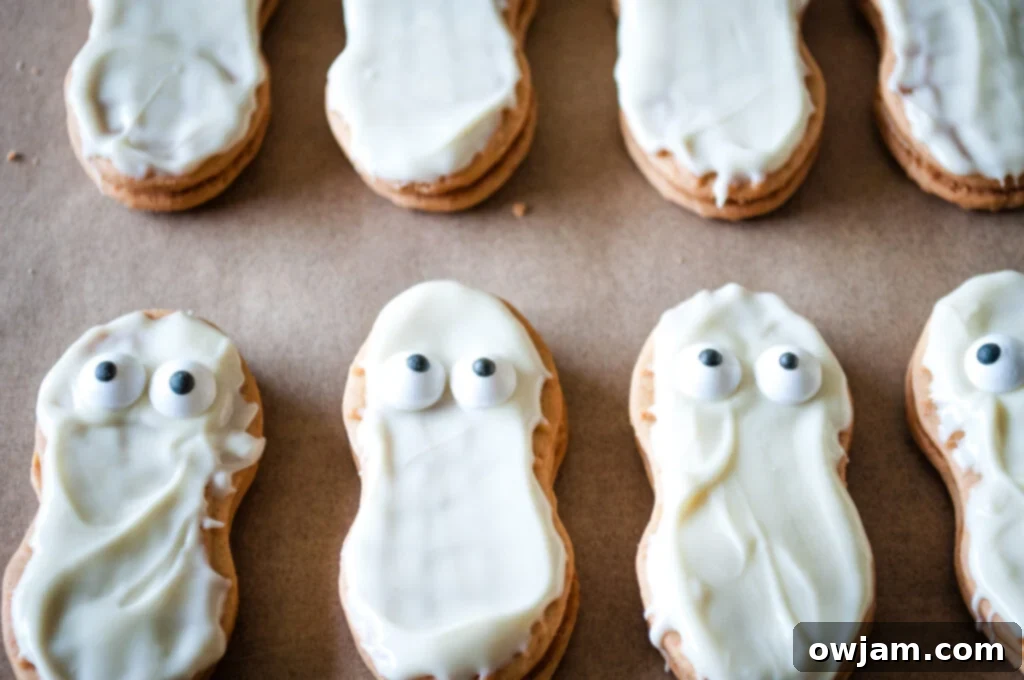
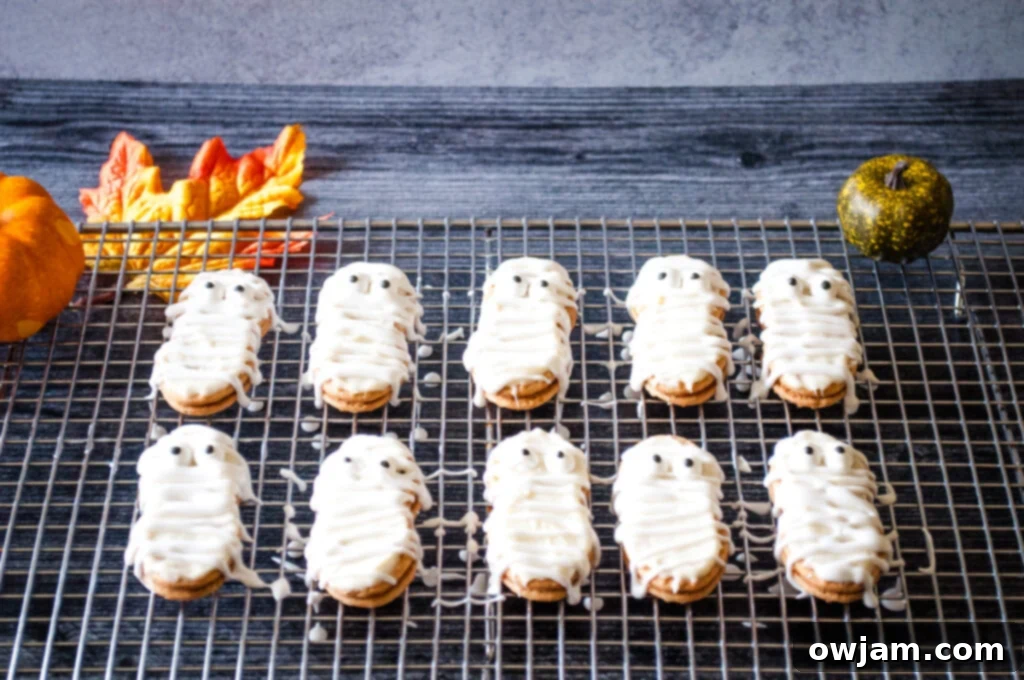
Step 4: Create the Mummy Rags. Once the chocolate is completely set, transfer the cookies to a cooling rack. Now for the fun part! Using your prepared frosting, drizzle it back and forth across the cookies in a zig-zag pattern. Aim to create irregular, crisscrossing lines that resemble linen bandages wrapping around the mummy. You can cover most of the cookie, leaving just the candy eyes peeking out from beneath the “rags.”
Step 5: Final Set and Serve. Let the frosting set up completely before serving. This usually takes about 20 minutes at room temperature, or again, you can place them in the refrigerator for a few minutes to speed things up. Once the frosting is firm to the touch, your adorable Mummy Cookies are ready to be enjoyed!
Tips for Perfect Mummy Cookies
- Don’t Overheat Chocolate: When melting white chocolate, especially in the microwave, go slowly. Overheating can cause it to seize and become thick and grainy. If it does seize, you might try adding a tiny bit of vegetable oil or shortening (about ½ teaspoon per cup) and stir vigorously to smooth it out, but it’s best to avoid it.
- Work Efficiently with Chocolate: White chocolate sets relatively quickly. Work in small batches if you’re making a large quantity, or reheat the chocolate briefly if it starts to thicken too much.
- Parchment Paper is Your Friend: Always use parchment or wax paper on your baking sheet. It prevents sticking and makes cleanup a breeze.
- Chill to Speed Setting: If you’re in a hurry, a few minutes in the refrigerator (5-10 minutes) will help the chocolate and frosting set much faster.
- Steady Hand for Frosting: For the mummy wraps, a steady hand and consistent pressure on your frosting tube/bag will create the neatest lines. Don’t worry if they’re not perfect; mummies are supposed to be a little ragged!
- Get the Kids Involved: This is an ideal recipe for children. Let them help with dipping (with supervision for hot chocolate), placing the eyes, and especially with the frosting drizzle!
Creative Variations and Customizations
While the classic Nutter Butter Mummy Cookie is a winner, don’t be afraid to get creative and customize your spooky treats!
- Different Cookie Bases: Experiment with other cookies. Chocolate sandwich cookies (like Oreos) make fantastic “Oreo Mummies” for a chocolatey twist. Graham crackers or shortbread cookies also work well.
- Chocolate Alternatives: For a “reverse mummy” effect, you could dip your cookies in milk or dark chocolate and then use white frosting for the bandages. You could also use colored candy melts (green, purple, orange) for a truly vibrant and unique mummy cookie.
- Flavored Frosting: While white frosting is traditional, consider using flavored white frostings (like vanilla or almond) or adding a drop of food coloring to your white frosting for a pop of color.
- Extra Spooky Details: Add a drop of red gel food coloring under one of the candy eyes for a “bloody” mummy, or use edible markers to draw small scars or stitches on the bandages.
- Sprinkle Fun: Before the white chocolate sets, sprinkle on some Halloween-themed sprinkles for extra sparkle and texture.
- Allergy-Friendly Options: For those with peanut allergies, use a different cookie base like shortbread or gluten-free cookies, and ensure all chocolate and frosting ingredients are free from allergens.
Storage Tips
Once your Mummy Cookies are completely set, storing them properly will ensure they stay fresh and delicious. Store them in an airtight container at room temperature for up to 5 days. If stacking, place a piece of parchment paper between layers to prevent the frosting from sticking together or smudging. While they can be refrigerated, it’s generally not necessary and can sometimes cause the chocolate to develop a slight “bloom” (a white film) due to temperature changes, which is harmless but affects appearance. Freezing is not recommended as the frosting can become watery upon thawing.
Frequently Asked Questions (FAQs)
- Q: Can I use regular chocolate chips instead of white chocolate melting wafers?
- A: Yes, you can use regular white chocolate chips. However, they may be a bit thicker and harder to work with than candy melts or wafers, which are designed for easy melting and a smooth finish. If using chips, ensure they are good quality and melt slowly to avoid seizing.
- Q: My chocolate seized! What went wrong?
- A: Chocolate seizes when it comes into contact with even a tiny amount of water or is overheated. To prevent this, ensure your bowl and utensils are completely dry, and melt the chocolate slowly and in short intervals, stirring frequently.
- Q: Can I make these Mummy Cookies ahead of time?
- A: Absolutely! These cookies are perfect for making 1-2 days in advance. Just store them in an airtight container at room temperature once they’ve fully set.
- Q: I can’t find candy eyes. What can I use instead?
- A: No problem! You can use mini chocolate chips placed upside down, small dots of black gel icing, or even draw eyes with edible food markers for a similar effect.
- Q: Are these cookies suitable for school parties?
- A: They are a fantastic option for school parties! Just be mindful of peanut allergies if Nutter Butter cookies are used. Many schools have strict no-nut policies, so consider using a plain shortbread cookie or an allergen-free cookie if needed.
Conclusion: A Spooky Sweet Success!
These Easy No-Bake Mummy Cookies are truly a highlight of the Halloween season. They offer the perfect blend of simplicity, fun, and deliciousness, making them an ideal project for families and a delightful treat for any spooky celebration. Whether you’re a seasoned baker or just looking for a quick and impressive dessert, these Nutter Butter mummies are guaranteed to be a hit. So gather your ingredients, enlist your little monsters, and get ready to create some hauntingly good treats!
Don’t forget to share your creations! Tag us on social media if you make these adorable Mummy Cookies – we’d love to see your spooky masterpieces!
Other Fall & Halloween Recipes You’ll Love
Turkey
Instant Pot Turkey Chili
snack
Mummy Hot Dogs
Beef
Beef and Bean Chili
Chicken
Instant Pot White Chicken Chili
Tried this recipe? Leave a star rating and comment below! Subscribe to my newsletter or follow me on
Facebook,
Instagram, or
Pinterest for the latest.
Mummy Cookies

Pin
Ingredients
- ¾ cup of white chocolate chips
- 10 Nutter Butter Cookies
- 20 Candy Eyes
- 1 container Betty Crocker Cookie Frosting in White
Instructions
-
In a double boiler or the microwave melt the white chocolate. If you use a microwave place the chocolate chips in a microwave safe bowl and microwave for about 15 seconds, stir and repeat until the chocolate is melted.
-
Dip the tops of the cookies in the chocolate OR use a knife to put the chocolate on the tops of the cookies.
-
While they’re still warm place the eyes Set aside to cool and set up.
-
Transfer the cookies to a cooling rack.
-
While they cool put the frosting in a frosting tube and cut the tip off the frosting tube.
-
Drizzle the frosting back and forth across the cookies to make mummy rags.
-
Let the frosting set up before serving which usually takes about 20 minutes.
Nutrition
Nutrition information is automatically calculated, so should only be used as an approximation.
