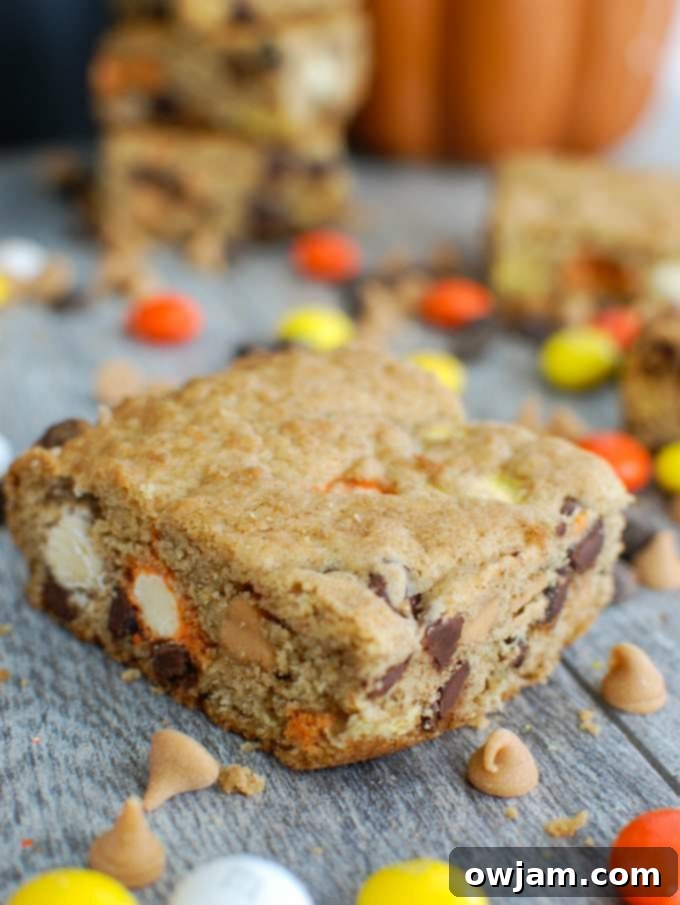
Spooktacular Monster Cookie Bars: The Ultimate Halloween & Fall Treat!
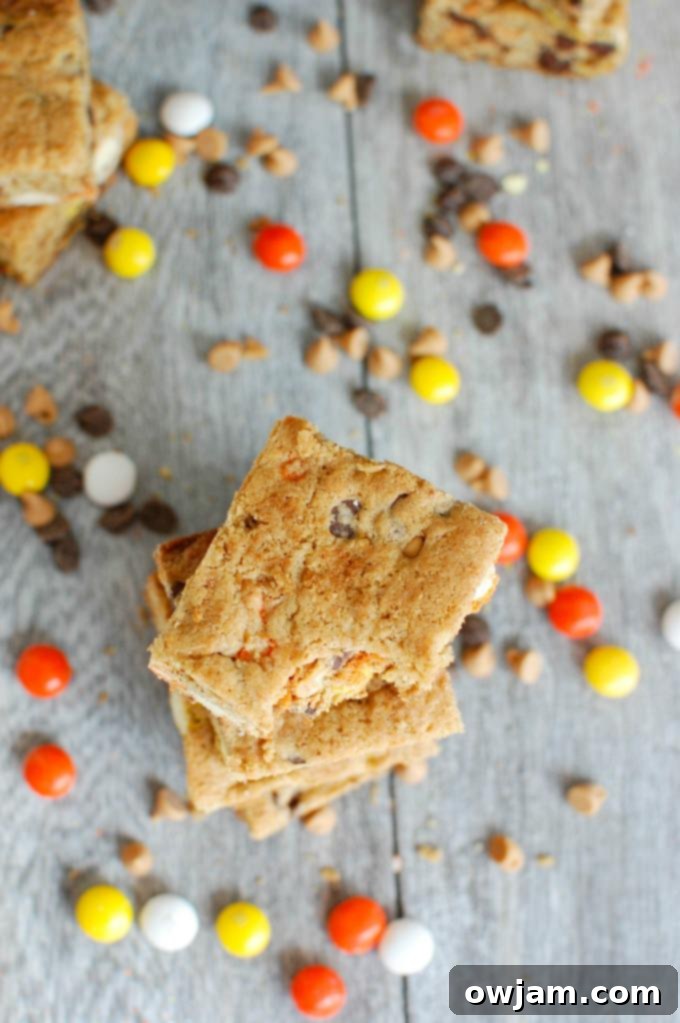
Monster Cookie Bars are a vibrant, irresistible delight, bursting with an exciting mix of White Chocolate M&M’s, rich chocolate chips, and creamy peanut butter chips. Baked into chewy, golden cookie bars, they’re the quintessential treat for your Halloween party, autumn gatherings, or simply to satisfy your sweet cravings throughout the fall season. Get ready to bake a batch of these crowd-pleasing, colorful bars that are as fun to make as they are to eat!
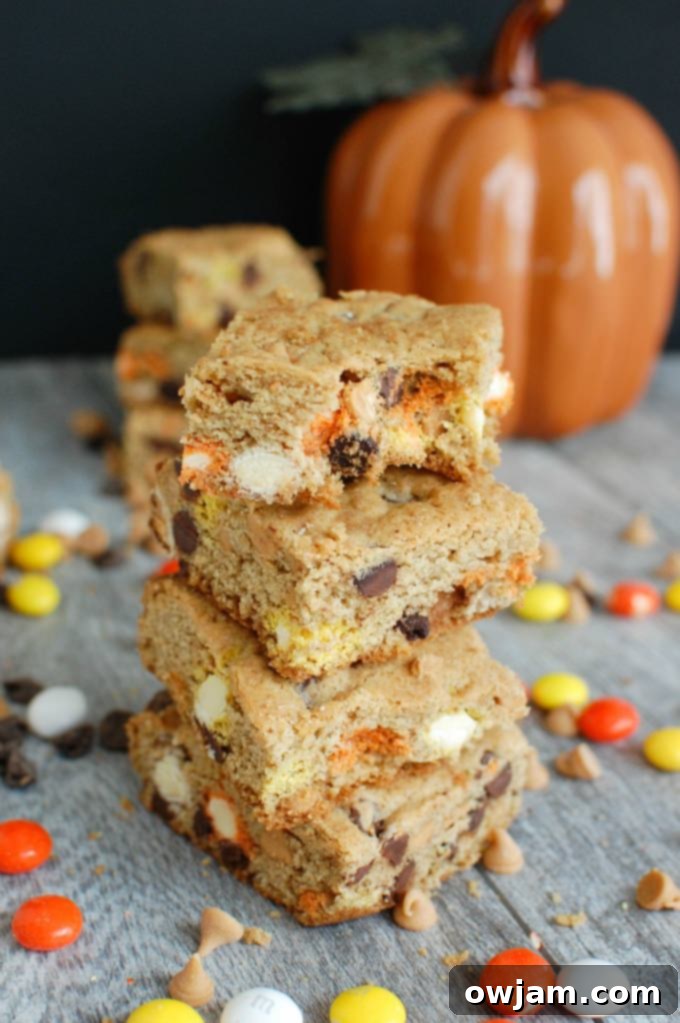
Embrace the Season with Festive Monster Cookie Bars
As the days grow shorter and the air turns crisp, the excitement for Halloween truly begins! It’s a time for spooky decorations, creative costumes, and, of course, delicious treats. Whether you’re planning a neighborhood bash, a school party, or simply looking for a fun baking project with your family, these Monster Cookie Bars are designed to be the star of the show. Imagine the joy of gathering in the kitchen, mixing up a batch of these colorful cookie bars, and then sharing them with loved ones as you discuss your Halloween plans or simply enjoy the cozy ambiance of autumn. My son, Will, is already mapping out his astronaut costume, and he’s even assigned his younger brother, Drew, the role of a martian – a perfect inspiration for these monstrously good treats!
Beyond the festive fun, these bars are incredibly versatile. They can be tailored to various dietary needs or simply to suit your taste preferences. For instance, if you’re sending them to a classroom where nut allergies might be a concern, simply swap out the peanut butter chips for extra chocolate chips or butterscotch chips. This adaptability makes them a go-to recipe for any occasion, ensuring everyone can enjoy a bite of their spooky-sweet goodness this fall.
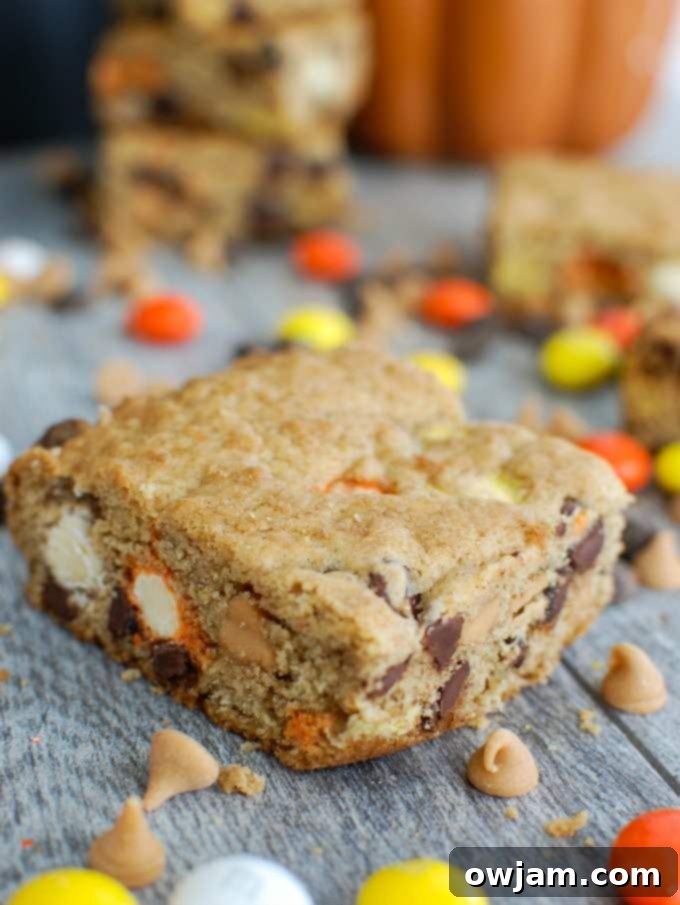
Unleash Your Inner Monster: Customizing Your Cookie Bars
What truly makes these Monster Cookie Bars live up to their name is the generous medley of mix-ins. Our recipe calls for a delightful trio: creamy peanut butter chips, classic semi-sweet chocolate chips, and the star of our spooky show, White Chocolate M&M’s. I recently discovered these festive White Chocolate M&M’s, and they’re an absolute game-changer! Their vibrant orange, black, and white colors are naturally perfect for Halloween, adding that extra pop of seasonal cheer to every bite. Plus, the subtle sweetness of white chocolate offers a wonderful contrast to the richness of the other chips, creating a complex flavor profile that’s utterly addicting.
But don’t stop there – the beauty of monster cookie bars lies in their endless customization. Feel free to unleash your creativity! The world of M&M’s alone offers a rainbow of possibilities; consider using crispy M&M’s for added texture, peanut M&M’s for extra crunch, or even seasonal varieties beyond Halloween. Beyond M&M’s, you can experiment with butterscotch chips, dark chocolate chunks, or even a handful of chopped candy bars. For those with peanut allergies, easily substitute the peanut butter chips with an equal amount of additional chocolate chips or a fun alternative like butterscotch chips. This recipe is a fantastic canvas for whatever sweet (or spooky) inspiration strikes you!
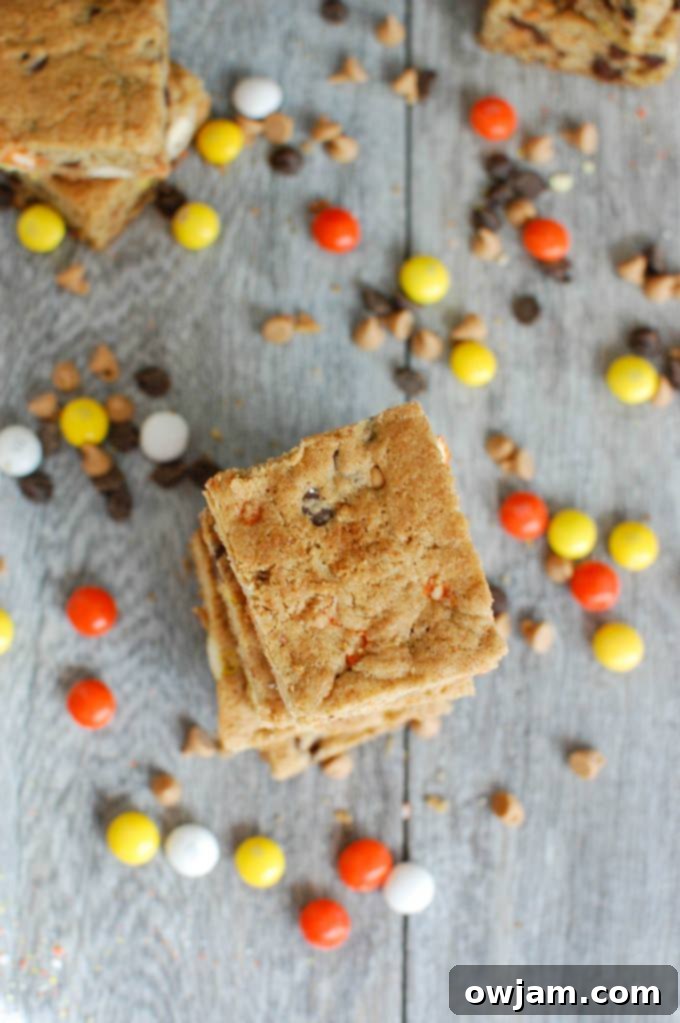
Why Cookie Bars are the Best Choice for Fall Gatherings
When it comes to baking for a crowd, especially during the busy fall season, cookie bars are often a superior choice to individual cookies. Their ease of preparation and transport make them ideal for potlucks, school functions, or simply having a batch ready for unexpected guests. Instead of scooping and baking multiple trays of individual cookies, you simply press the entire batter into a single pan, bake, and then slice. This significantly cuts down on prep and active baking time, freeing you up to enjoy other autumnal activities like pumpkin carving or apple picking.
Beyond convenience, cookie bars offer a delightful chewiness and gooey texture that is often harder to achieve with standalone cookies. The larger surface area retains moisture, resulting in a perfectly soft center and crisp edges. These Monster Cookie Bars, with their generous load of M&M’s and chips, become a decadent mosaic of flavors and textures in every square. They’re also incredibly portable; once cooled and cut, they can be stacked in a container or individually wrapped, making them perfect for lunchboxes, care packages, or handing out to trick-or-treaters (if you dare share them!).
Expert Tips for Baking Perfect Monster Cookie Bars
Achieving the perfect Monster Cookie Bar is simple with a few baking best practices. These tips, many inspired by the brilliant cookie bar recipes from Jess at Stuck on Sweet, will ensure your bars turn out incredibly delicious every time:
- Room Temperature Ingredients Are Key: Make sure your butter and eggs are at room temperature. This allows them to cream together properly with the sugars, creating a light, fluffy, and well-aerated base for your cookie dough. This step is crucial for achieving that wonderfully soft and chewy texture.
- Don’t Overmix the Flour: Once you add the dry ingredients to the wet, mix only until just combined. Overmixing develops the gluten in the flour too much, which can lead to tough, dense cookie bars rather than the tender, soft ones we’re aiming for.
- Pan Preparation is Essential: Lining your 9×13 inch baking pan with aluminum foil and then spraying it thoroughly with non-stick spray is a game-changer. The foil creates “handles” that make it incredibly easy to lift the entire slab of cooled cookie bars out of the pan. This prevents sticking and ensures clean, effortless slicing.
- Gentle Fold for Mix-Ins: When incorporating the peanut butter chips, M&M’s, and chocolate chips, remove the bowl from the mixer and fold them in by hand. This prevents the chips from breaking up and ensures they are evenly distributed throughout the dough without overworking it.
- Baking Time for Texture: The baking time (25-30 minutes) offers a slight range depending on your preference. For softer, gooier bars, stick to the shorter end of the baking time. If you prefer a slightly firmer, more set bar, bake for the full 30 minutes. Keep an eye on them; the edges should be lightly golden, and the center should appear mostly set.
- Cool Completely Before Cutting: This might be the hardest step because the aroma of freshly baked cookie bars is irresistible! However, it’s vital to let the bars cool completely in the pan before attempting to lift them out and cut them. Warm bars are fragile and prone to crumbling. Cooling them allows them to set properly, resulting in neat, clean slices.
- Flour Alternatives: While I’ve incorporated whole wheat flour for a subtle nutty flavor and extra fiber, you can absolutely use 2 1/4 cups of all-purpose flour if you prefer or don’t have whole wheat flour on hand. The recipe is forgiving!
Storage and Serving Suggestions
Once your Monster Cookie Bars are baked to perfection and cooled, proper storage will keep them fresh and delicious for days. Store them in an airtight container at room temperature for up to 3-4 days. If you want to extend their shelf life, you can refrigerate them for up to a week. Just be aware that refrigeration might make them a bit firmer, so allow them to come to room temperature before serving for the best soft texture.
These cookie bars are also freezer-friendly! To freeze, cut the cooled bars into individual squares. Place them in a single layer on a baking sheet and freeze until solid, about 1-2 hours. Once frozen, transfer the bars to a freezer-safe bag or airtight container, separated by parchment paper to prevent sticking. They can be stored in the freezer for up to 2-3 months. When you’re ready to enjoy, simply thaw them at room temperature or warm them slightly in the microwave for a few seconds for that fresh-baked feel.
Serve these Monster Cookie Bars as a stand-alone dessert, pair them with a scoop of vanilla ice cream for an extra indulgent treat, or offer them as part of a larger dessert spread for your Halloween party. Their vibrant colors and delightful flavors are sure to be a hit with everyone!
Tried this recipe? Leave a star rating and comment below! Subscribe to my newsletter or follow me on
Facebook,
Instagram, or
Pinterest for the latest.
Monster Cookie Bars
Julia Jolliff
10 minutes
25 minutes
35 minutes
12 bars
Ingredients
- 1 cup whole wheat flour
- 1 1/4 cups all-purpose flour
- 1/2 teaspoon salt
- 1 teaspoon baking soda
- 1 teaspoon cornstarch
- 2 sticks unsalted butter, room temperature
- 1 cup light brown sugar
- 1/4 cup granulated sugar
- 2 eggs
- 1 teaspoons vanilla
- 1 cup peanut butter chips
- 1 cup M&M’s , {I used a white chocolate Halloween variety}
- 3/4 cup semi-sweet chocolate chips
Instructions
-
Preheat oven to 375 degrees F (190 degrees C). Line a 9×13 inch baking pan with aluminum foil, leaving an overhang on the sides for easy lifting, and spray with non-stick spray.
-
In a medium bowl, whisk together the whole wheat flour, all-purpose flour, salt, baking soda, and cornstarch. Set aside.
-
In a stand mixer fitted with a paddle attachment (or using a hand mixer), cream the softened unsalted butter and both sugars (light brown and granulated) until the mixture is light and fluffy. This typically takes about 2 1/2 to 3 minutes.
-
Add the vanilla extract, then beat in the eggs one at a time, mixing well after each addition. Scrape down the sides of the bowl as needed to ensure everything is fully incorporated.
-
With the mixer on low-speed, gradually add the reserved dry flour mixture in small batches, mixing until just incorporated and no streaks of flour remain. Remove the bowl from the mixer and gently fold in the peanut butter chips, M&M’s, and semi-sweet chocolate chips by hand.
-
Spoon the thick cookie batter into the prepared baking pan. Using a spatula or your hands, press the batter evenly into the pan.
-
Bake for 25 minutes for softer, gooier bars, or for 30 minutes for slightly firmer, less gooey bars. The edges should be lightly golden, and a toothpick inserted into the center might come out with moist crumbs, but not wet batter. Let bars completely cool in the pan on a wire rack before lifting them out using the foil overhangs and cutting into squares.
Notes
- If there is a peanut allergy, substitute the peanut butter chips for chocolate or butterscotch chips.
- I love Jess’s idea to use aluminum foil on the bottom of your pan {make sure to still spray it with non-stick spray}. It helps to get those bars out without them sticking. Just make sure you cool the bars completely before you try to remove them.
- I subbed whole wheat flour but you can use 2 1/4 cups all-purpose flour if you don’t want to use whole wheat flour.
Nutrition
Carbohydrates: 57g,
Protein: 5g,
Fat: 25g,
Saturated Fat: 15g,
Polyunsaturated Fat: 1g,
Monounsaturated Fat: 6g,
Trans Fat: 1g,
Cholesterol: 71mg,
Sodium: 219mg,
Potassium: 154mg,
Fiber: 3g,
Sugar: 37g,
Vitamin A: 556IU,
Vitamin C: 0.1mg,
Calcium: 56mg,
Iron: 2mg
Nutrition information is automatically calculated, so should only be used as an approximation.
Tried this recipe?Mention @acedarspoon or tag #acedarspoon!
